
Hello dear ones, it’s Marija
As promised, this week’s blog will be dedicated to the art of making a tadelakt plaster. There was a workshop last Saturday, in which I had the honor to be one of the organizer and participant. We made the plaster on a furnace. Around 10 grown-ups and 4 kids were there to make this work of art.
First, I will start with a little bit of introduction to the technique itself and then continue with my hands-on experience. The word itself comes from the Arabic word tadleek that means to rub or to massage. Tadelakt is one of the oldest plastering techniques in the world. It dated back 2000 years ago. The legend says that it was discovered by accident, when the city ramparts of Marrakech were built. The workers were trying to make the walls as straight as possible, so they started rubbing them repeatedly with a stone, and the walls became smooth and shiny. Firstly it was used by the Berbers for their water cisterns, then as an exterior facade for the palaces, mosques, riads or as an interior wall in the bathrooms or hammams. Thanks to its edgy look, durability and ecological qualities, it made its way to nowadays modern architecture all over the world.
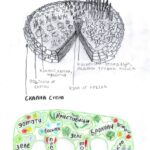
In our own experiment, we put three layers on the furnace before we started rubbing it with very smooth river stones. In the first layer we used 1 part hydraulic lime, 1 part quartz sand, 4/5 fine wood chips and water by the eye. We used quartz sand in the first layer because the furnace had some cracks in the last clay and straw layer, so this way we wanted to make sure that they will be filled. First we sprayed the furnace really well with water, before we started putting the first layer of the plaster, and also occasionally we were spraying water even while putting the plaster on, because of the heat it was drying really fast and this causes a lot of cracks. Summer is not the best period for this technique, but if you are doing it, make sure you often spray with water. Winter time would not be the best solution either because then the drying period between the layers will be very long, so the best time would be fall and spring. This of course is appliable in Bulgaria, not all over the world, depending on the climate differences. We didn’t make the first layer super smooth and perfect cause there we two more layers to come and a lot of rubbing.
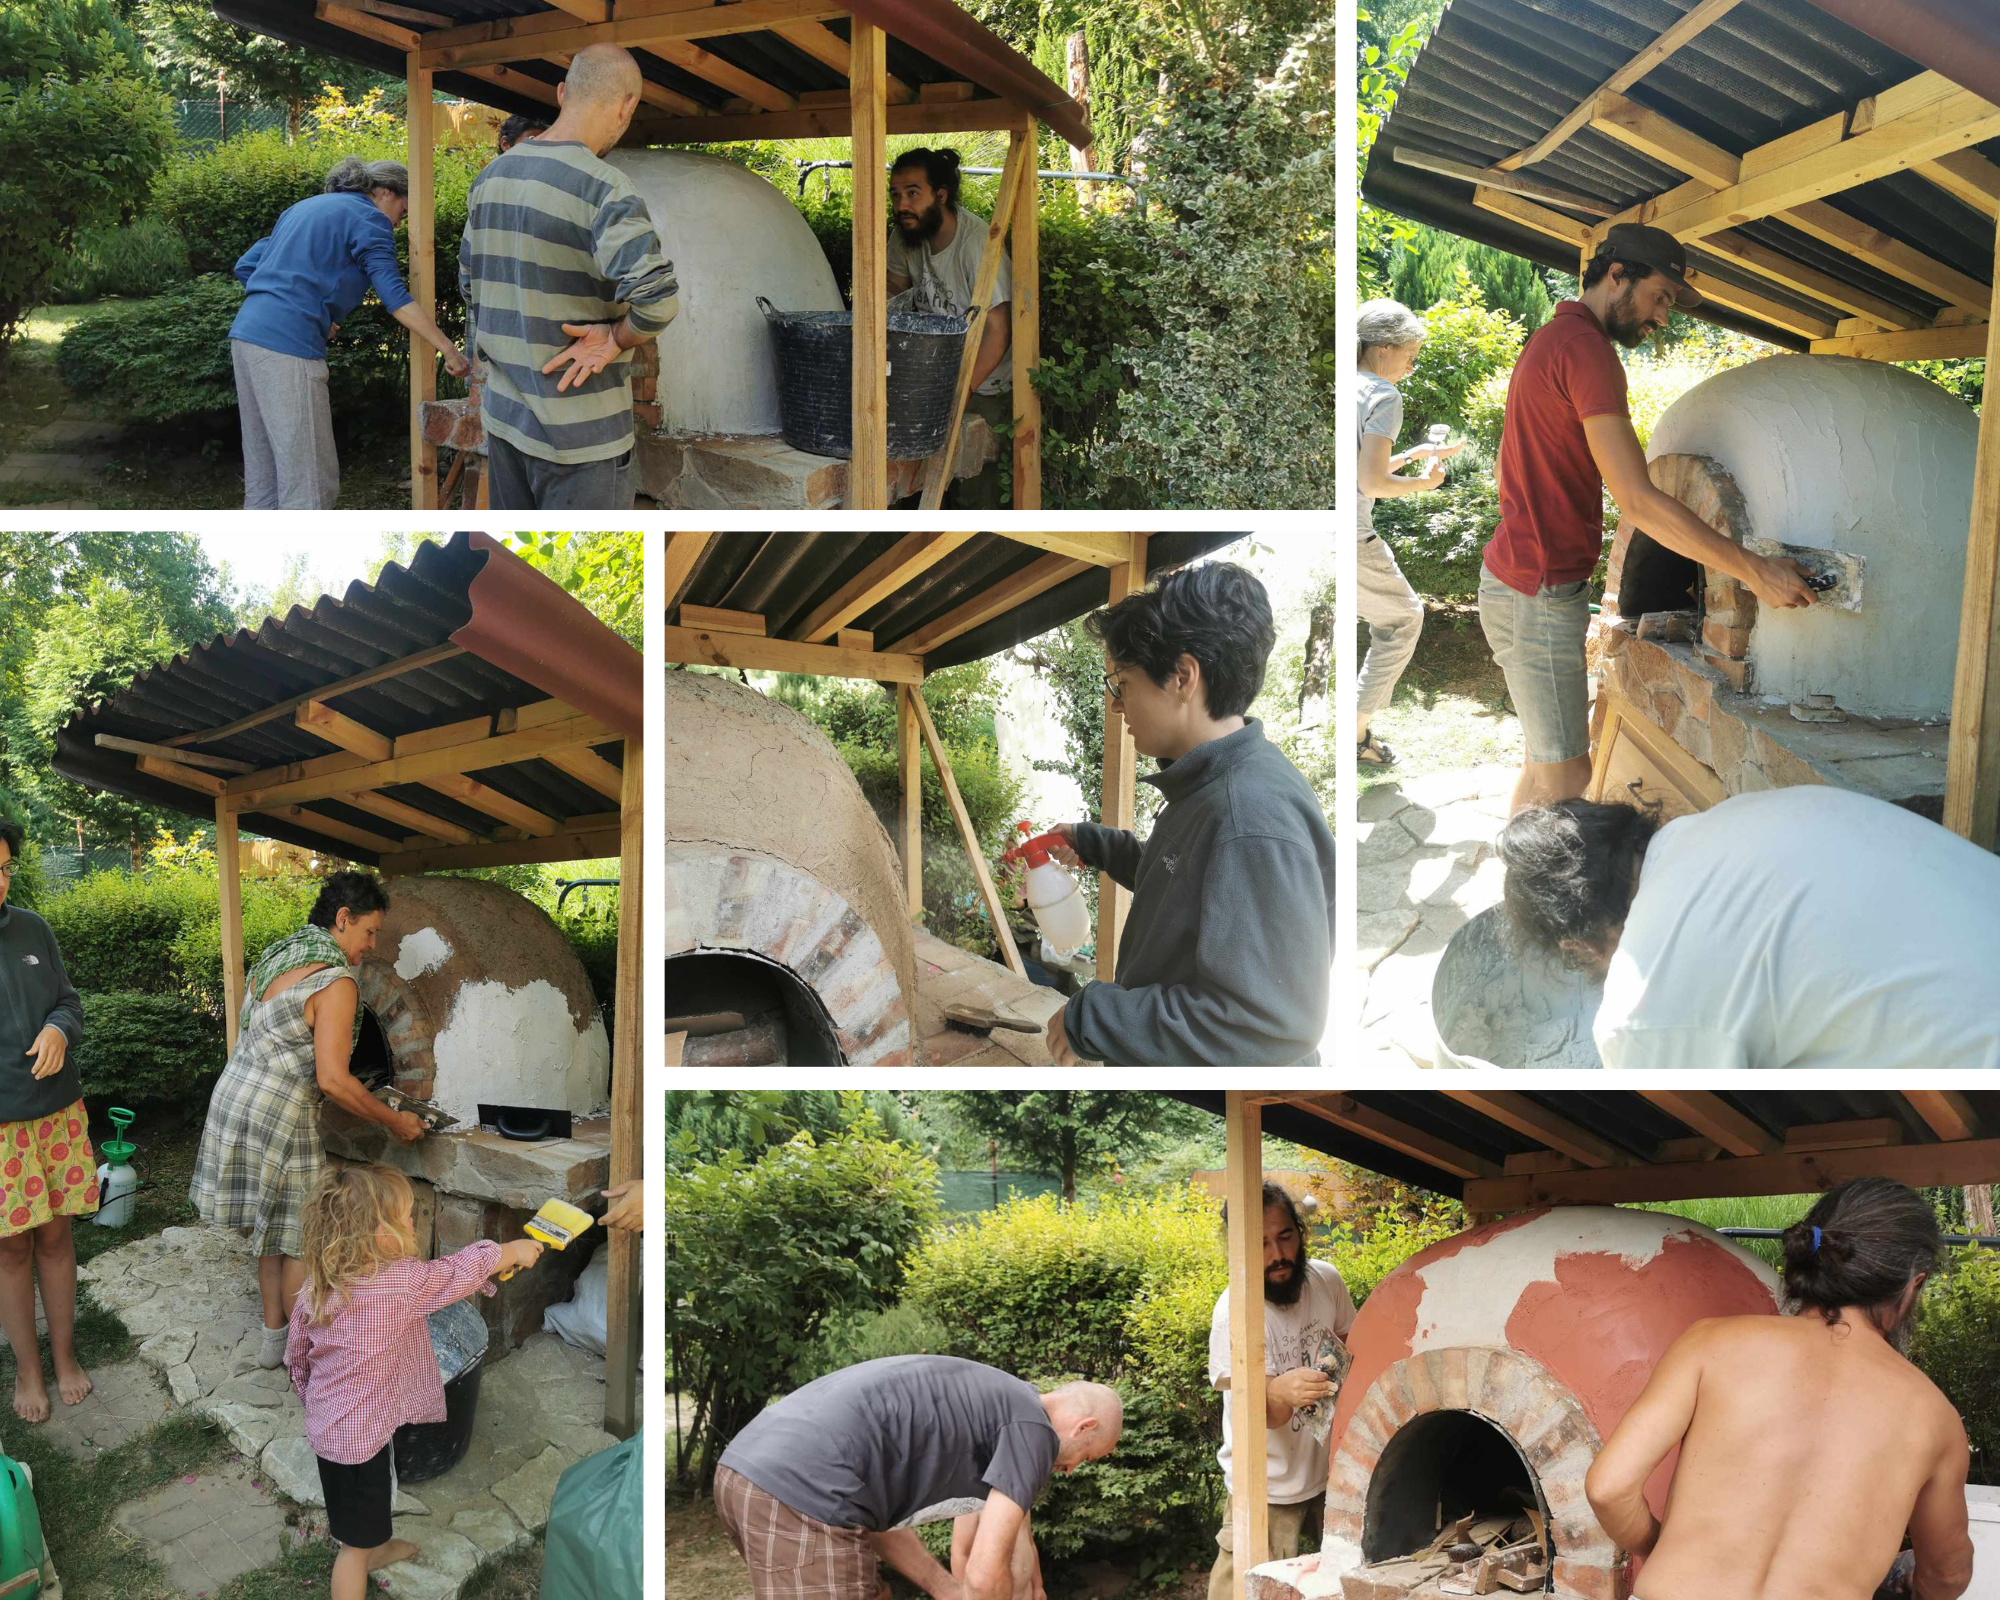
Up left: Putting the second layer
Down left: Putting the first layer
Middle: Spraying with water before we start
Up Right: Finishing up the first layer
Down right: putting the third layer with the pigment
After we finished the first layer, we waited for around two hours, so it will dry. There is a catch with the drying part because you really need to watch for the best moment to start another layer. It should not be too dry, and it should not be too wet. For this case, I was happy we had someone with experience with this technique. During the waiting period we were checking for cracks and when there were some we were rubbing them with wet sponge and they filled up.
For the second layer, we used the same materials that we used in the first one, with the exception that it was made really smooth. This time around, we waited for over three hours. In the third layer we put one part hydraulic lime, one part quartz sand, 15 percent of pure clay and a natural pigment. Again a lot of effort was put to make it smooth because the polishing is what followed.
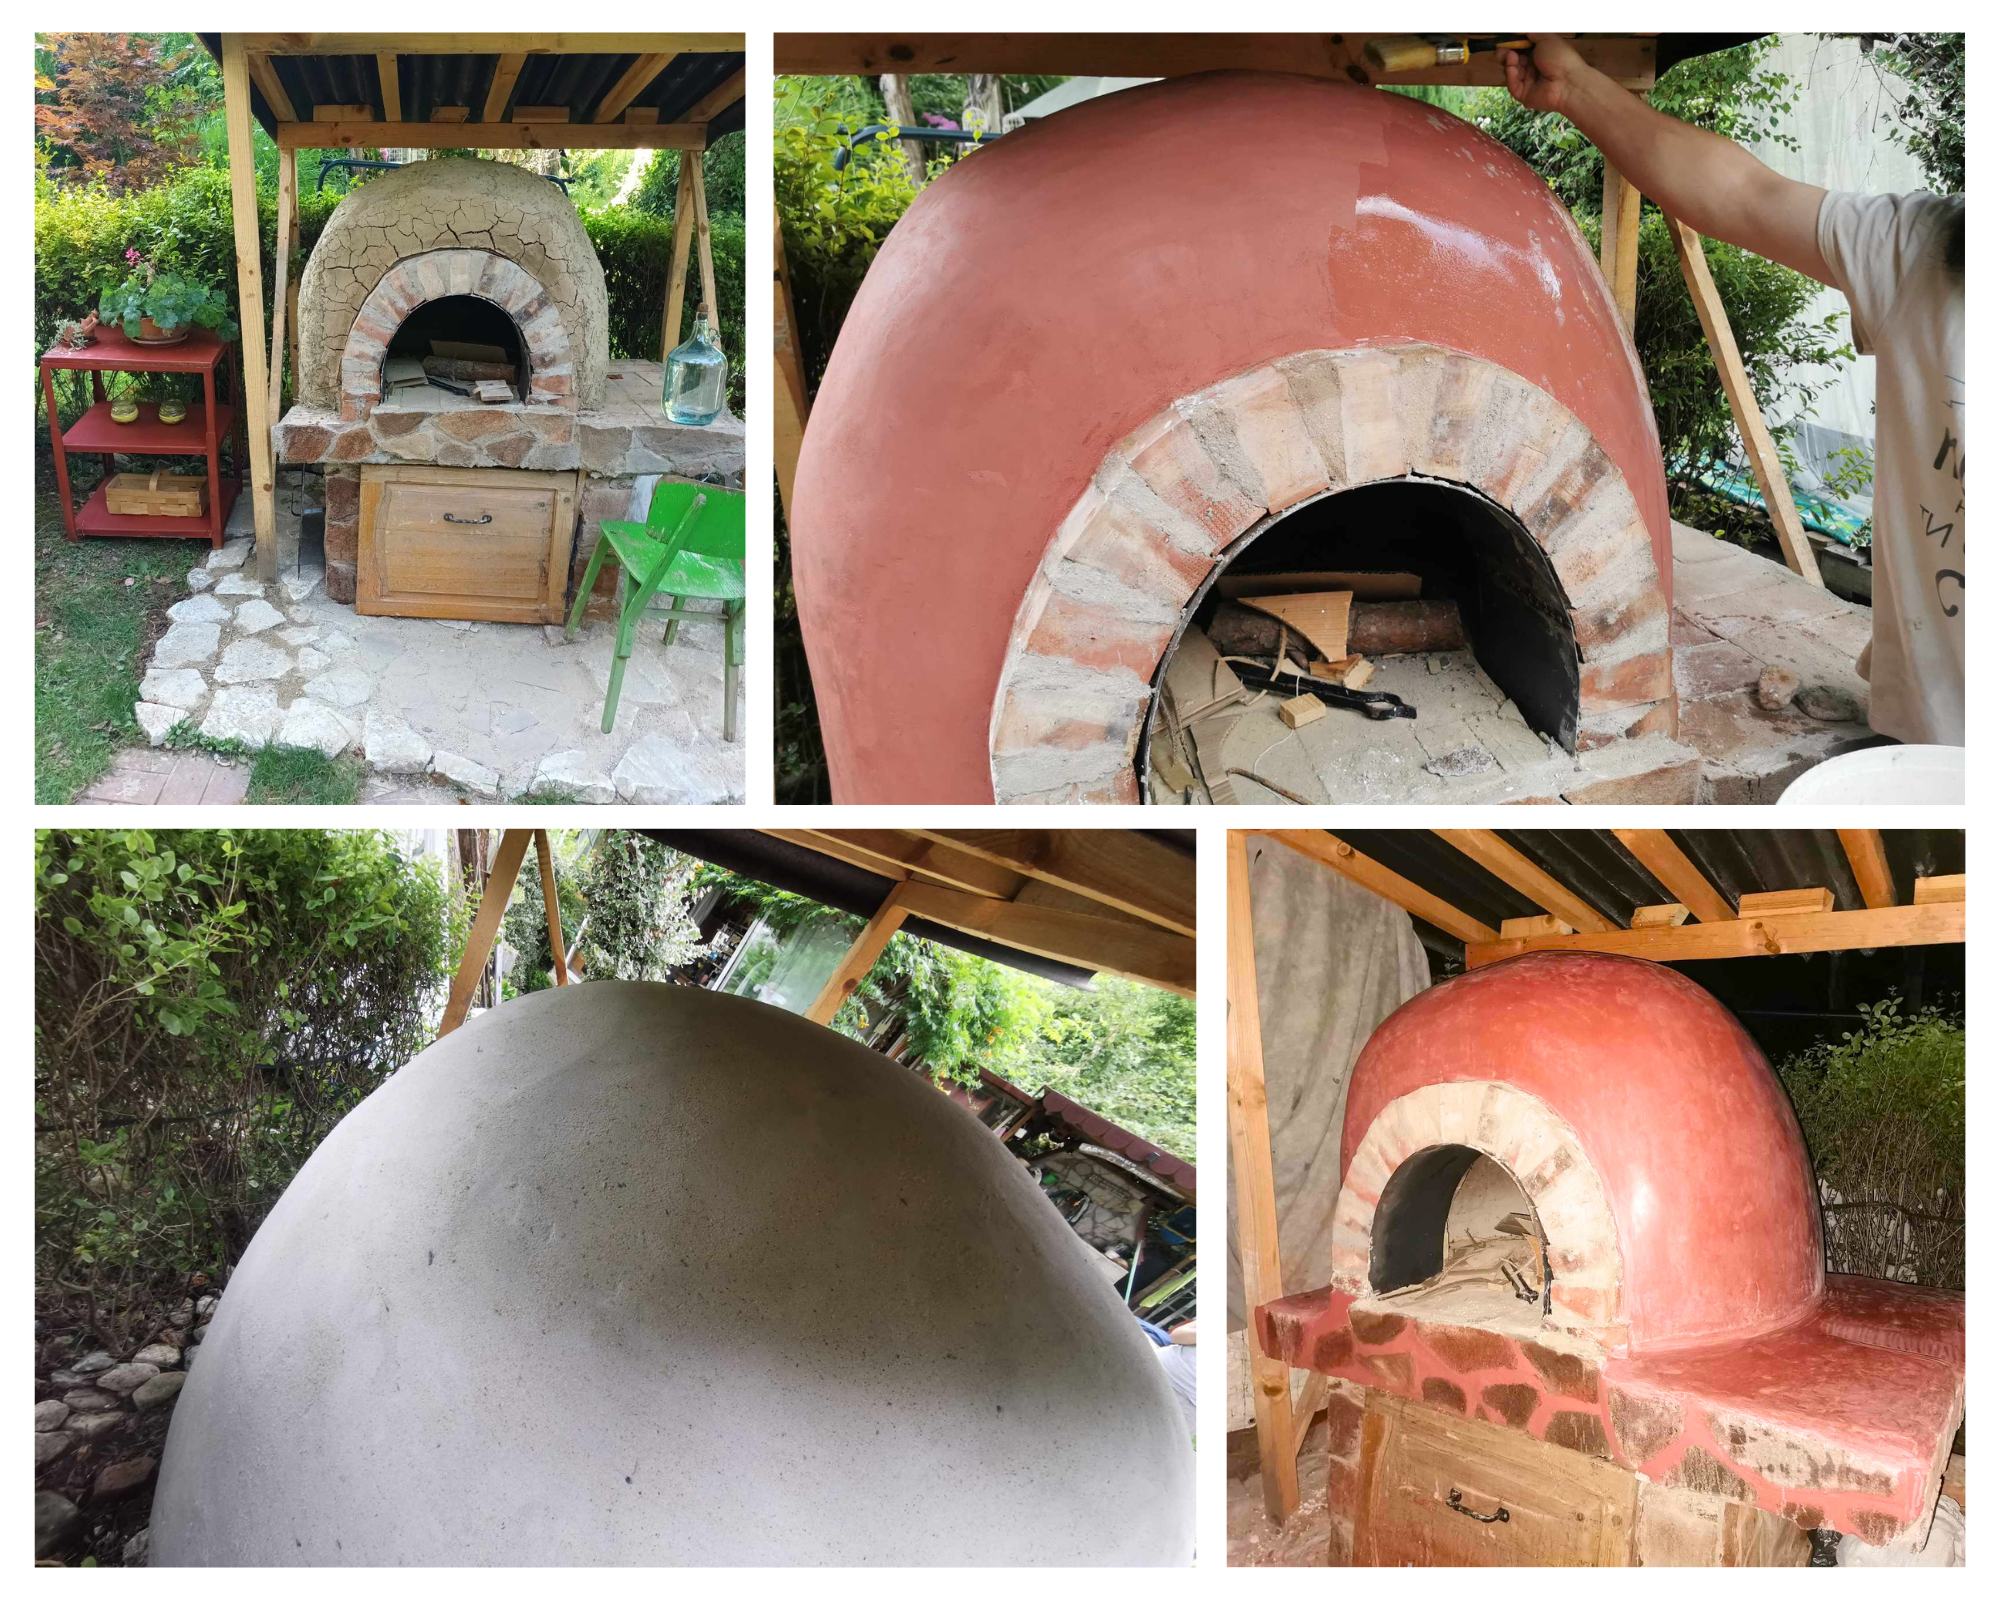
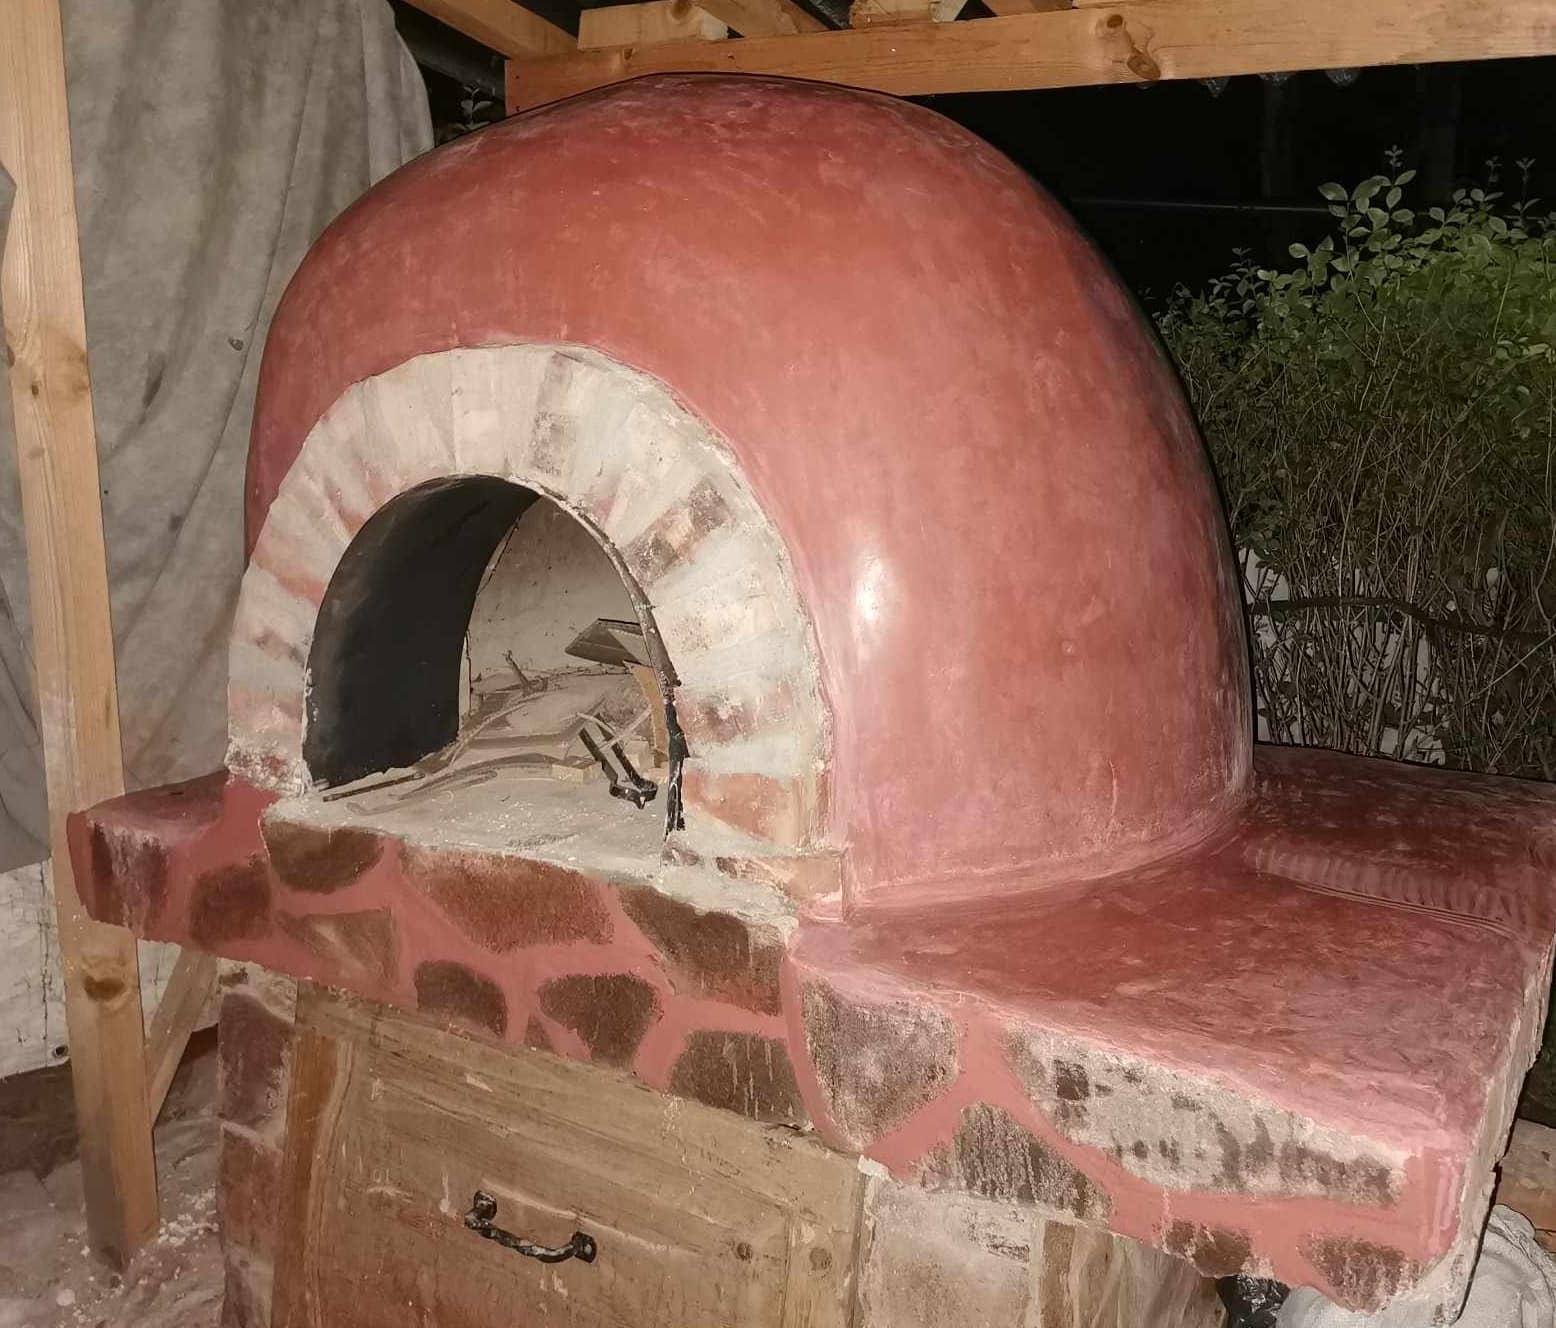
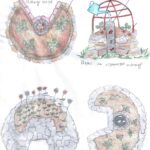
Up left: The furnace before we started working
Down left: Second layer of the plaster
Up right: Putting the soap and water mixture for the polishing
Down right: End result
The polishing needs to start on a drier surface than the previous layers. We mixed ½ part Moroccan black soap (which has gel like consistency) and 1 part water. With a fine brush, we put one layer from the mixture all over the furnace and started polishing. This was the longest part of the whole thing. I am happy we were more people because it took a lot of time. After the soap is rubbed in, then we put the soap and water mixture again and repeat the polishing process. We repeat this until the soap and water mixture no longer can be rubbed in, meaning it became waterproof.
Personally, I was impressed with the beauty and the smoothness of it. It is a lot of work, but it is worth it. In the end, we had a discussion of what could be done differently in the future for even better results. One of the thing as I mentioned are the weather conditions and also maybe put one more layer before we start polishing.
Until next week and new adventures!
.
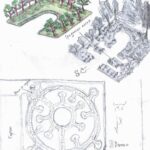
Основният инструмент на пермакултурата е функционалната организация на пространството – пермедизайн. Способността за идентифициране и установяване на връзки между всички елементи на околната среда ще бъде ключът към хармоничното подреждане на конкретен обект. Абсолютно всеки природен елемент влияе и засяга системата като цяло. Понятията „плевел“, „вредител“, „болест“ и т.н. са познати на традиционното земеделие не е приемливо в пермакултурата. Основният принцип е да се създадат устойчиви системи, които осигуряват собствените си нужди и рециклират отпадъците си.
В природата няма остри или прави линии, поради което пермакултурните дизайнери правят предметите по-естествено кръгли. Всички елементи взаимодействат помежду си. Рационално и икономично използване на пространството и ресурсите. В една градина можете да хармонизирате много различни видове растения, защото е по-естествено, както в природата. Високите растения с големи листа осигуряват сянка за малките, подправките и другите култури с остър аромат отблъскват вредители и насекоми. Освен това разнообразието от флора подхранва почвата с минерали и почвата с химични елементи.

Приятен ден на всички!